www.joemadart.com/darksiders2 (v1.2.0)
Ulkhror twintter page
QUESTS
MISC
WEAPONS & ARMORS
Axes
Maces
Glaives
Scythes
Sticks and stones (Mystics)
As you enter The Fjord for the first time, go West to meet Blackroot. He will gives you the side quest "Sticks and stones" and a special stone named the Lure Stone.
With it, Death can now harvest the stonebites scattered in all the realms... by shooting them with Redemption.
From now on, each time you gather 3 stones of any type (Mystics (blue), Power (red), Resistance (yellow)), you can bring them back to Blackroot and exchange them for a boost to one attribute.

Reward on completion (All the stones): unique Guillotine scythes

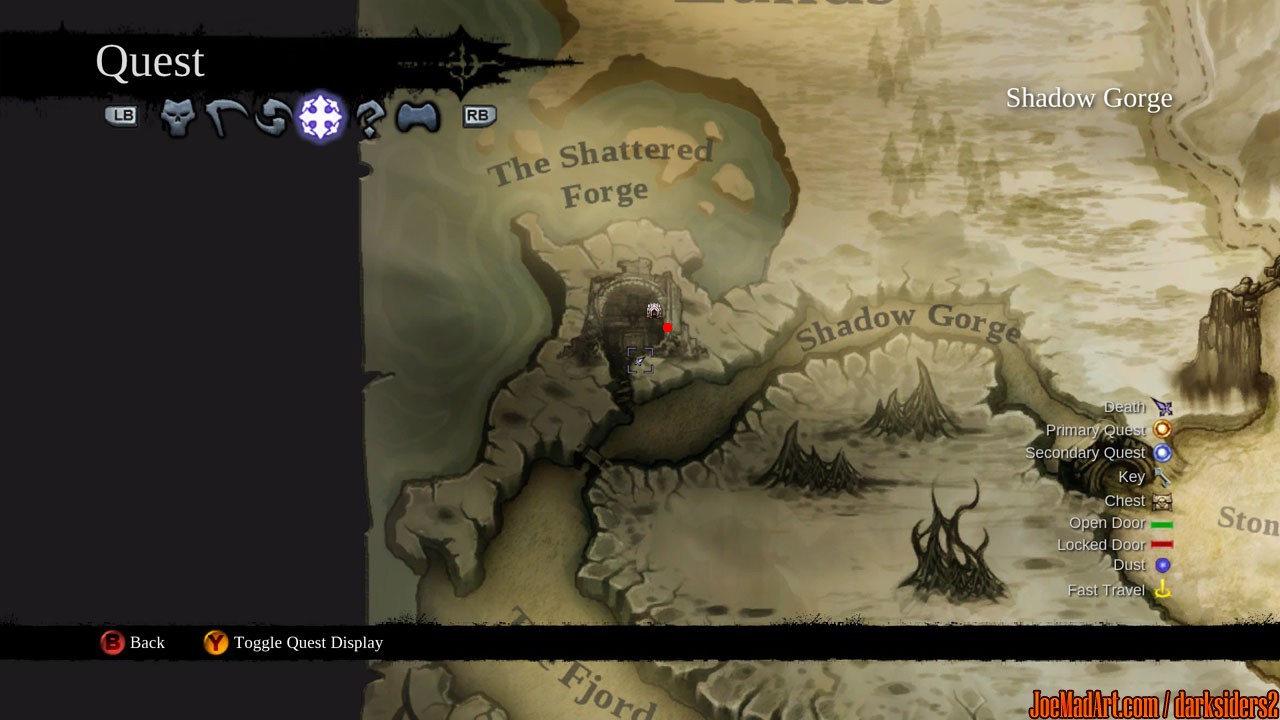
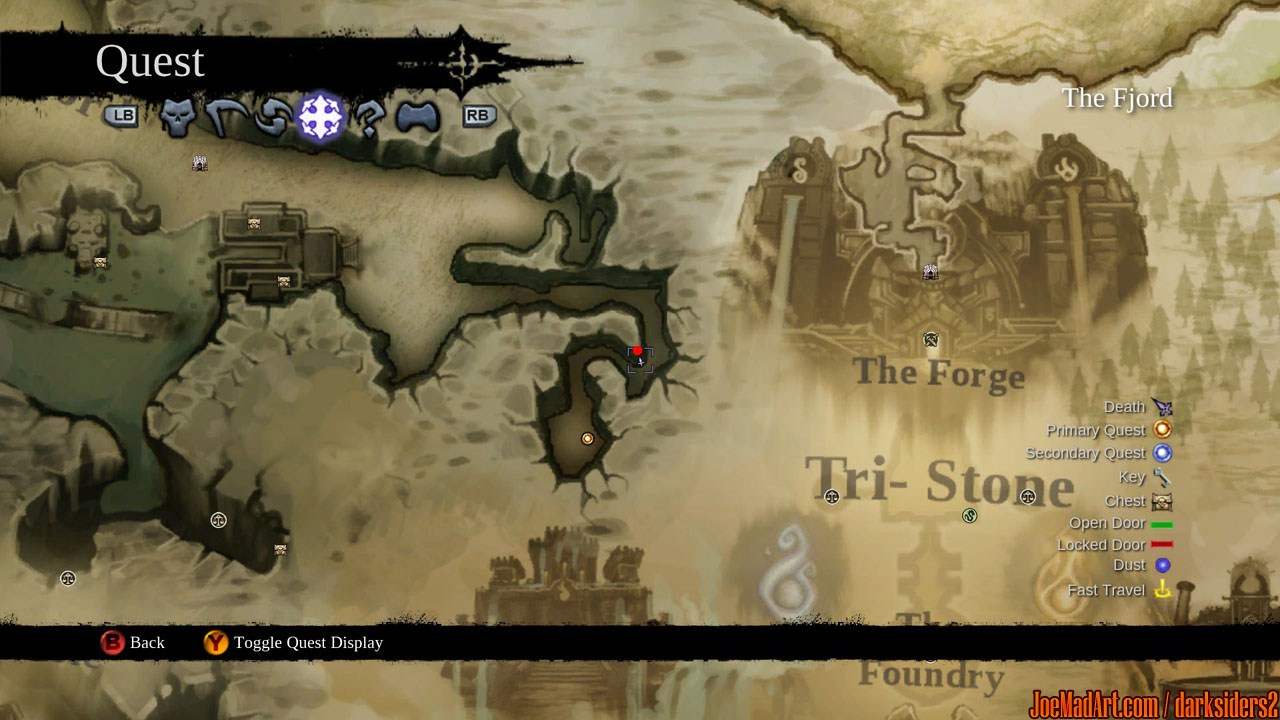
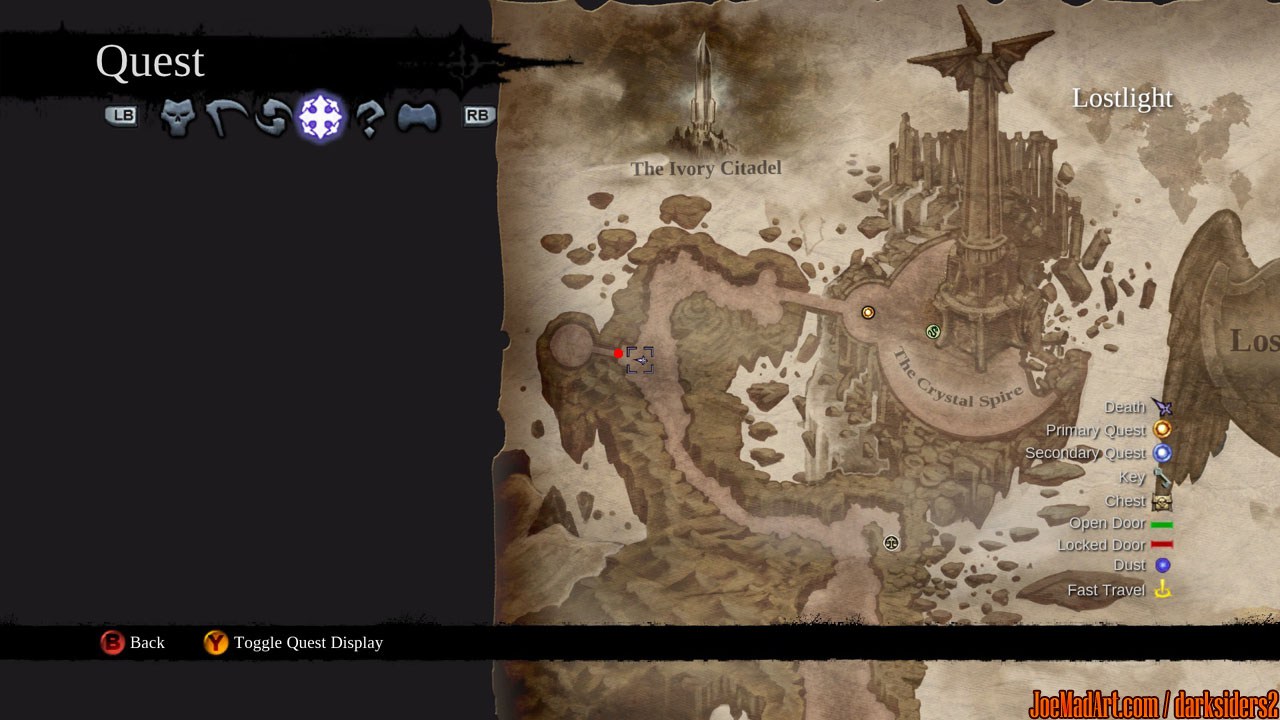
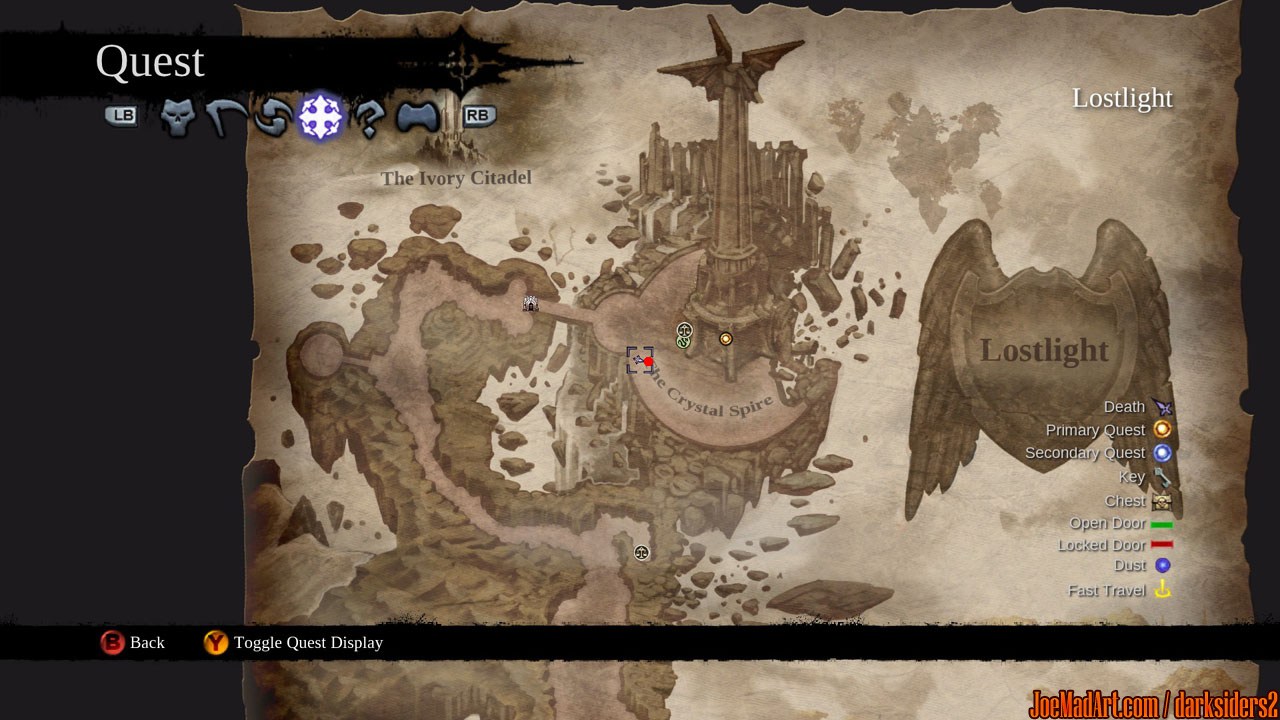
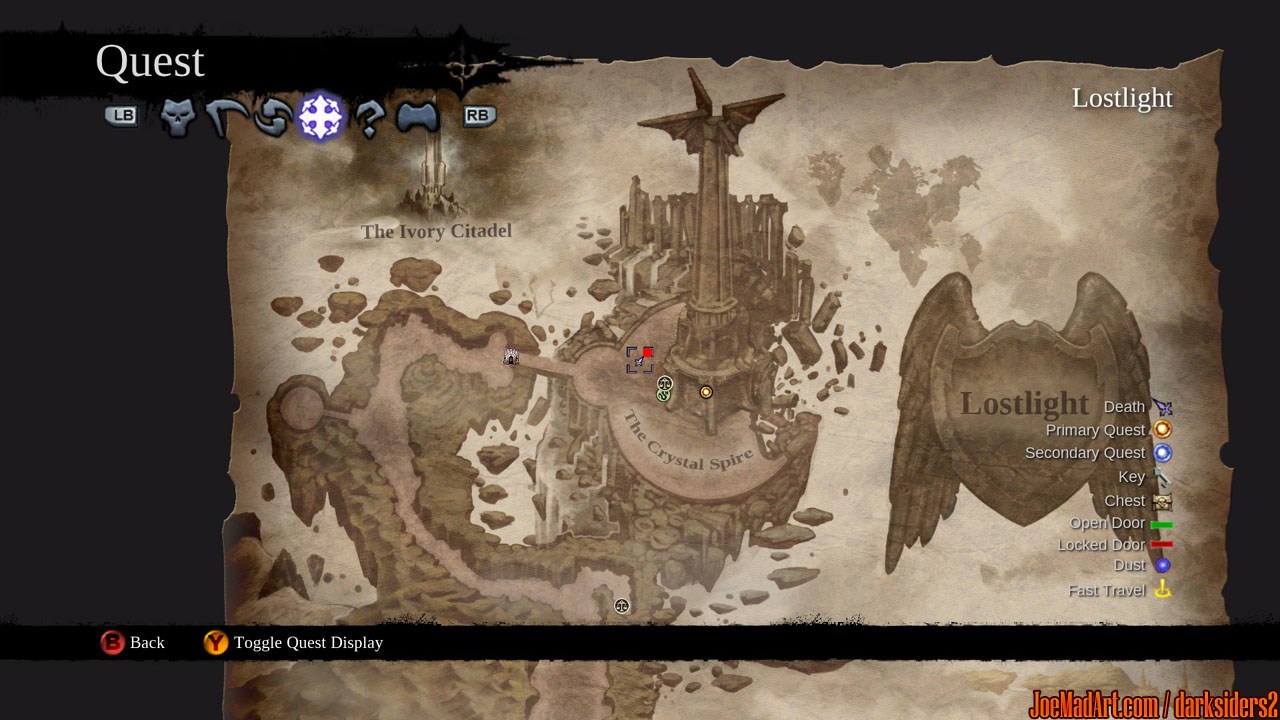
Here is below the locations of all the stones:
- Stones of Mystics × 34
- Stones of Power × 25
- Stones of Resistance × 10

See below for all the possible combinations of stones and the boost associated:
1 stone of mystics1 stone of mystics1 stone of mystics: arcane +5
1 stone of power1 stone of power1 stone of power: strength +5
1 stone of resistance1 stone of resistance1 stone of resistance: resistance +20
1 stone of mystics1 stone of mystics1 stone of power: arcane critical chance +2%
1 stone of mystics1 stone of mystics1 stone of resistance: arcane critical damage +10%
1 stone of power1 stone of power1 stone of mystics: critical chance +2%
1 stone of power1 stone of power1 stone of resistance: critical damage +10%
1 stone of resistance1 stone of resistance1 stone of mystics: wrath +20
1 stone of resistance1 stone of resistance1 stone of power: defense +20
1 stone of mystics1 stone of power1 stone of resistance: health +30

Stones of Mystics × 34
#1The Fjord : near Blackroot
#2Stonefather's Vale : far in the north, high on a cliff
#3Baneswood : at the top of the northwest ruin
#4Baneswood : on a cliff in the north
#5Baneswood : in a stone shrine
#6Baneswood : at the top of a ruin in the west
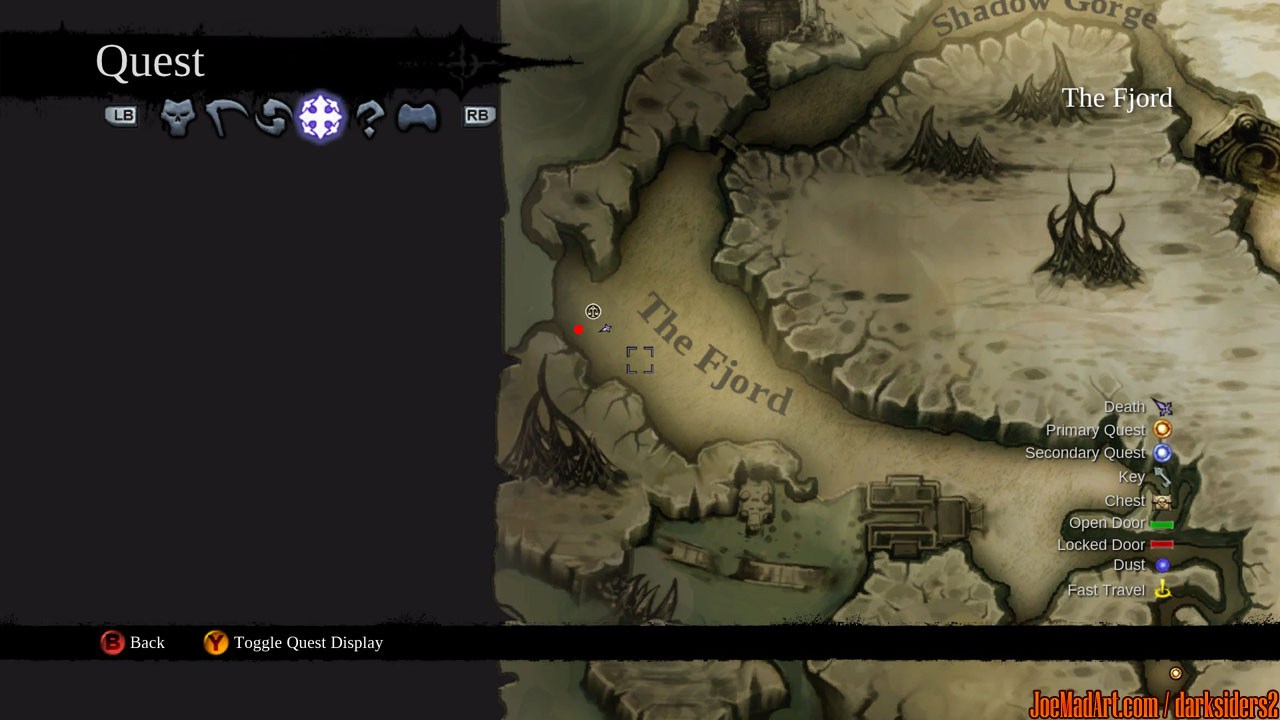
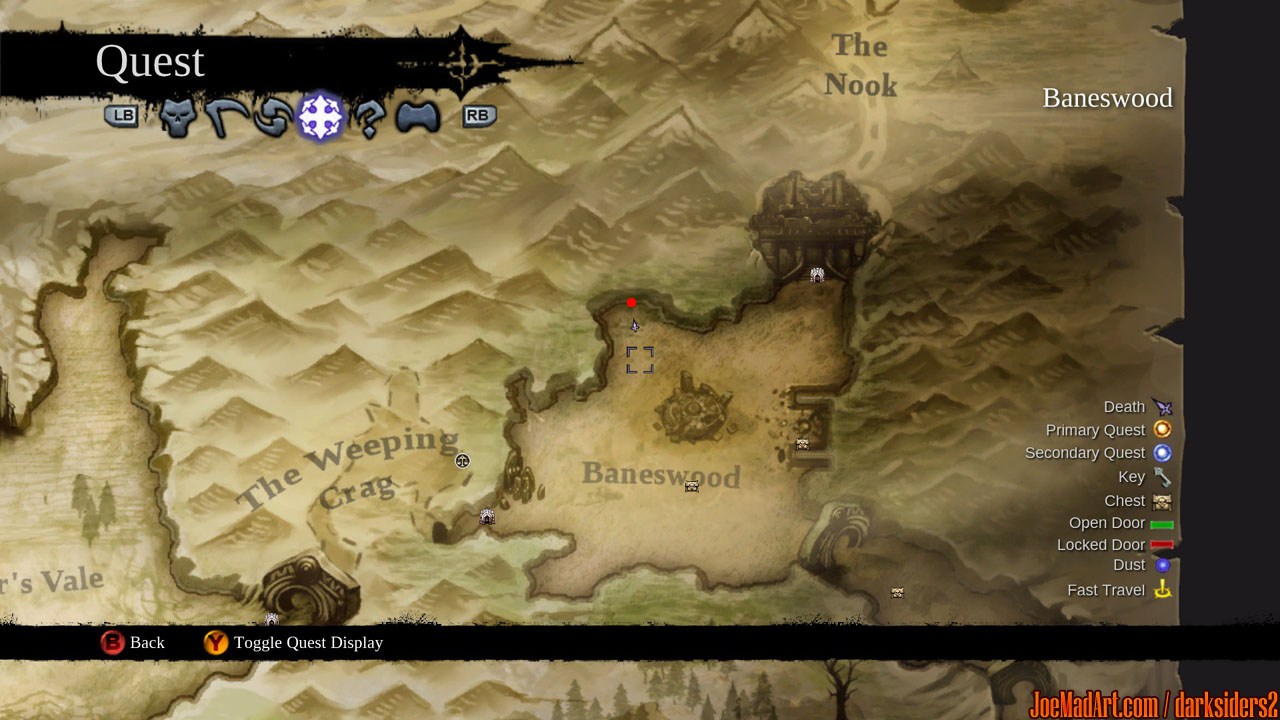
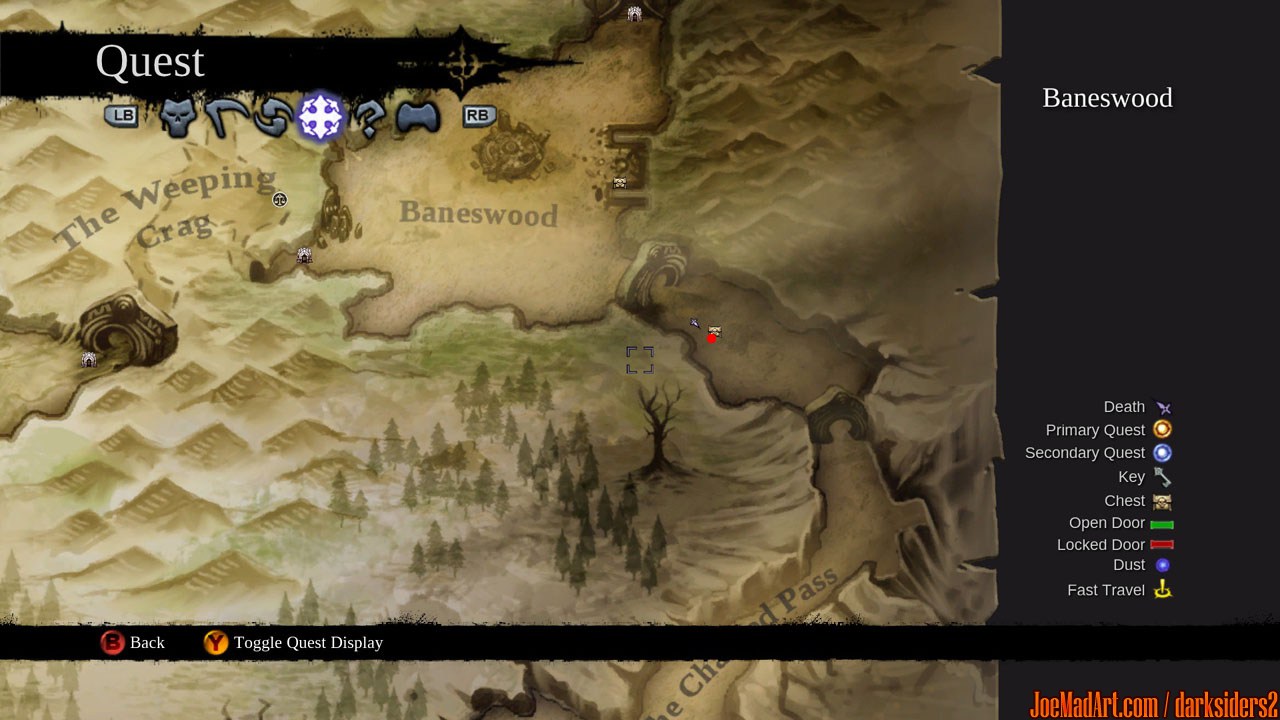
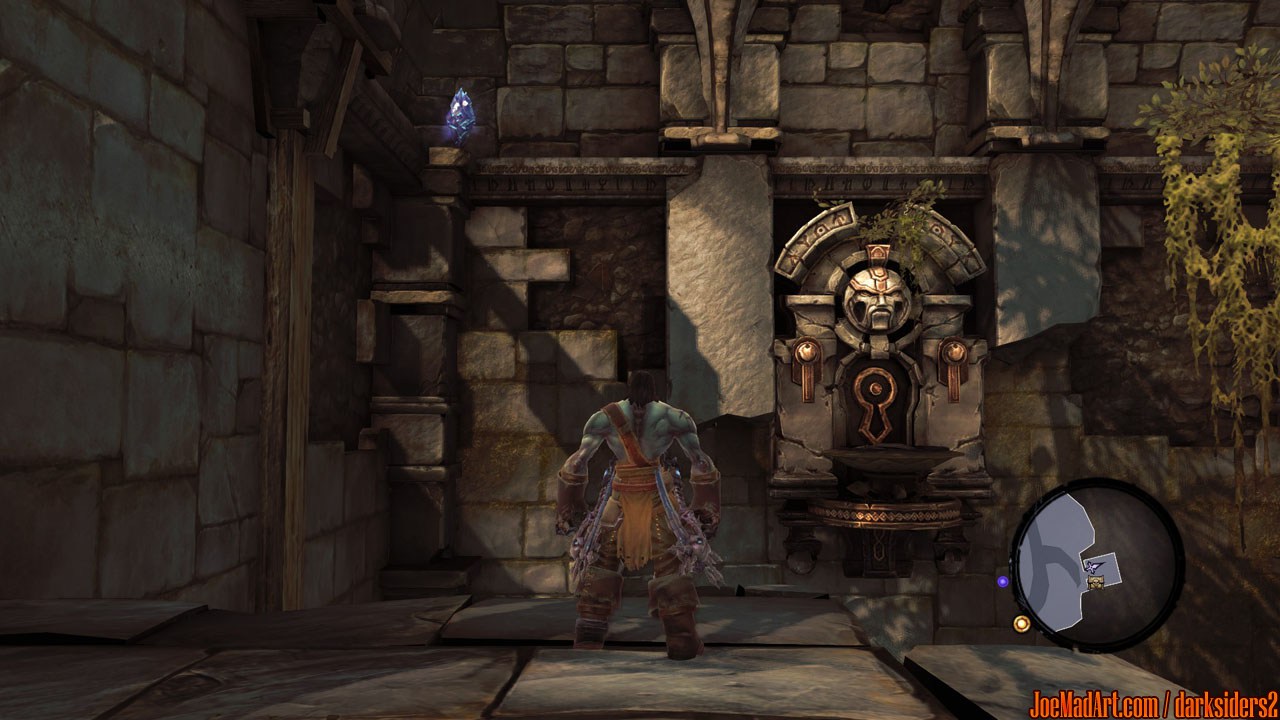
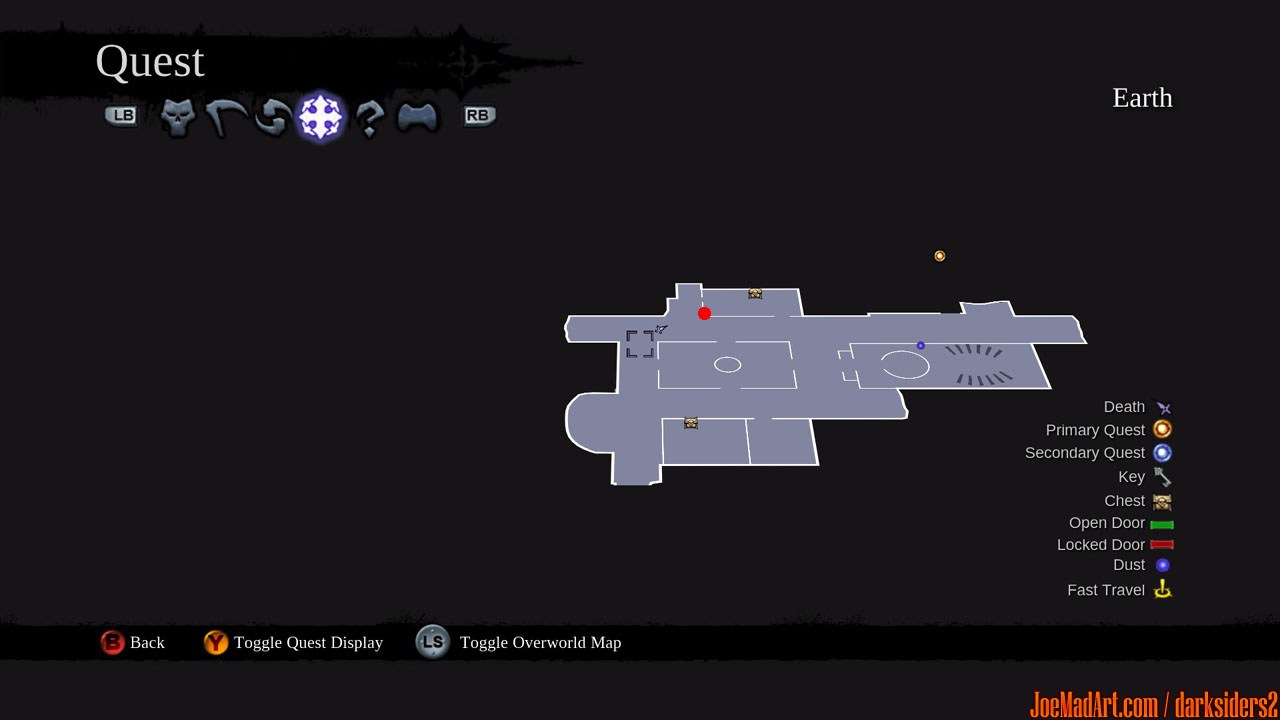
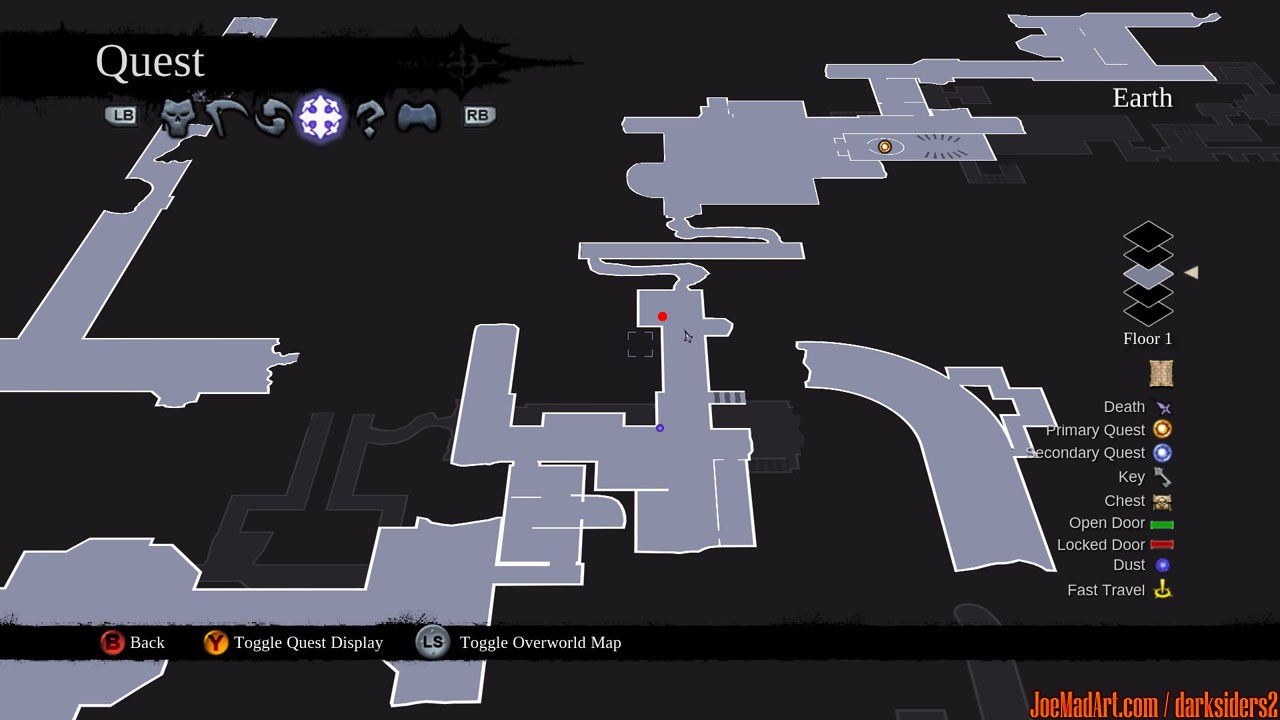
You will have to climb and perform a few wall runs to reach this stone.
#7The Charred Pass : on a cliff
#8The Charred Pass : in a ruin in the Southwest
#9Shadow Gorge : at the entrance of The Shattered Forge
#10The Fjord: In the trail leading to The Drenchfort
#11The Drenchfort: above the south water canal
#12The Maker's Forge: up on a wall behind the forge
#13The Nook: at the top of an elevator
#14The Lost Temple: on a wall in a small pit
#15The Weeping Crag: on a pillar not far from Vulgrim
#16Serpent's Peak: on the ceilling near Vulgrim
#17The Guilded Arena: on a statue at the entrance
#18The Guilded Arena: on the ceiling of a wide room
#19On an hanging cage in the room of the first Animus Stone
#20The Maw: on a window of the south gate
#21Phariseer's Tomb: floor 4 on a wall in the room of the elevator
#22Judicator's Tomb: South tower, on the ceiling of the Bone Giant room
#23The Psychameron: above the last door leading to the boss
#24Boneriven: on a spike in a curve
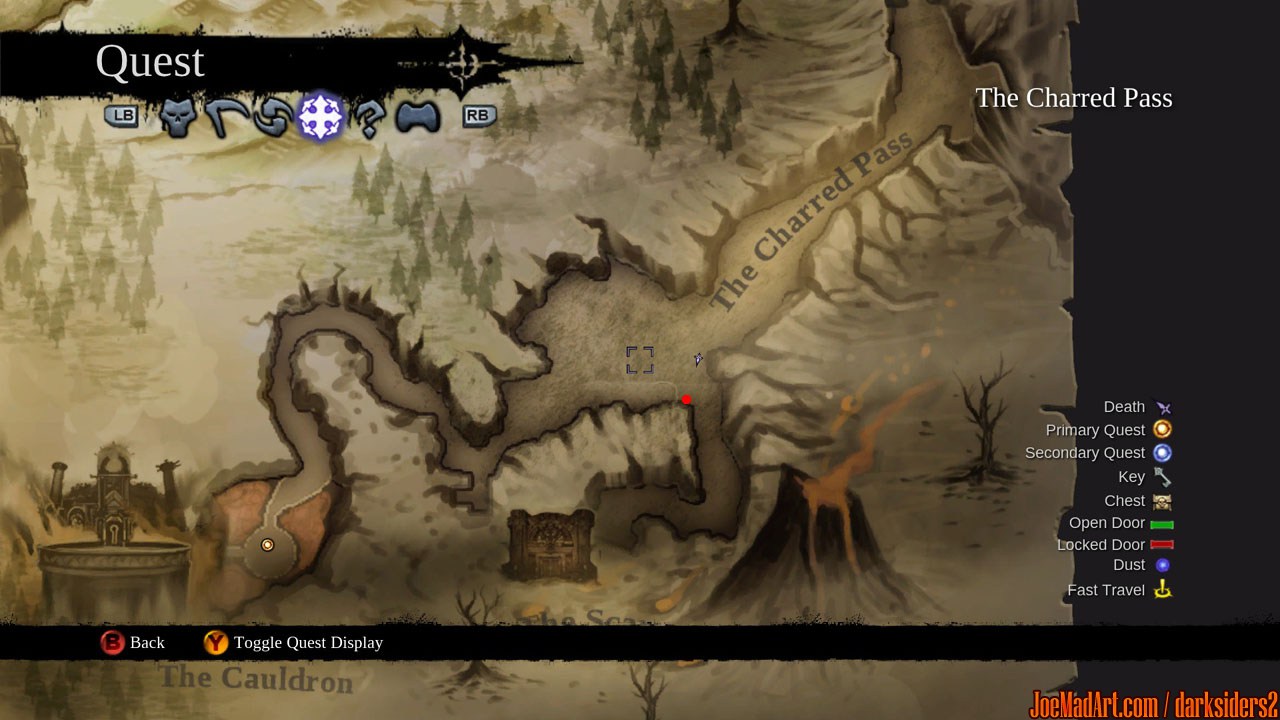
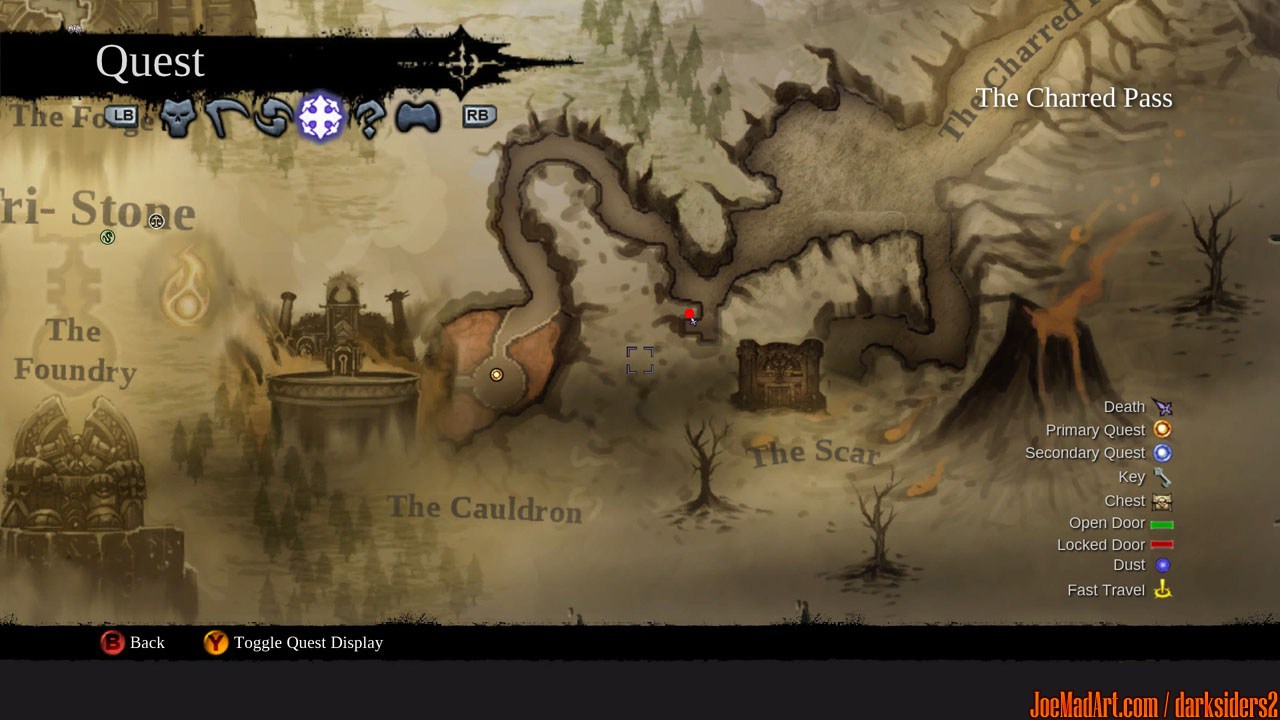
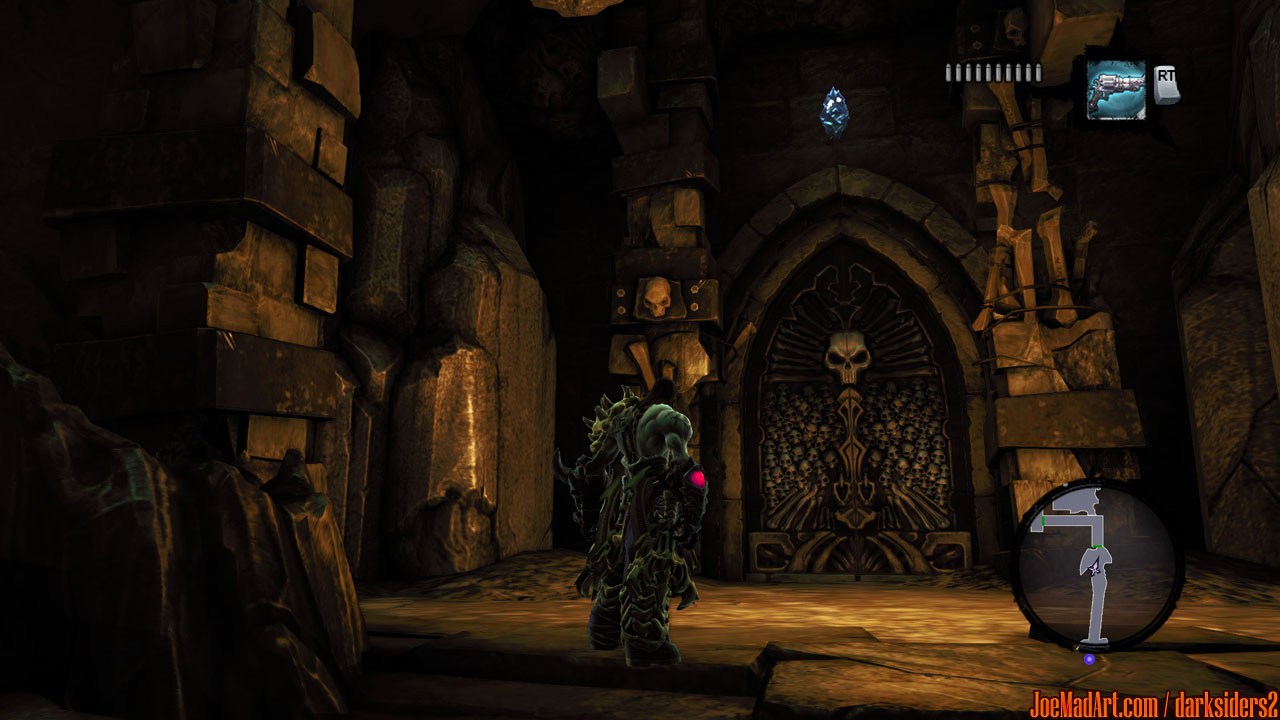
Note: The entrance of Boneriven dungeon is located in Sentinel's Gaze.
#25Lostlight: above the entrance of the Death Tomb III
#26Lostlight: on the sword of an angel statue (1)
#27Lostlight: on the sword of an angel statue (2)
#28Earth: up on the corner of a building
#29Earth: on the ceiling near the first piece of the Staff of Arafel
#30Earth: in a building near an overpass
#31Earth: on a support column of the broken bridge
#32The Ivory Citadel: in the upper passage of the East Courtyard
#33The Ivory Citadel: on the stair's archway of the East tower entrance
#34The Soul Arbiter's Maze: behind the portal leading to the 8th level


TOP
All the trademarks and copyrights presented on this website / blog are the property of their respective owners.
Website designed and developed by @Ulkhror mail: ulkhror@joemadart.com.